

22 Halloween Party Decor Ideas for a Celebration That Feels Like You
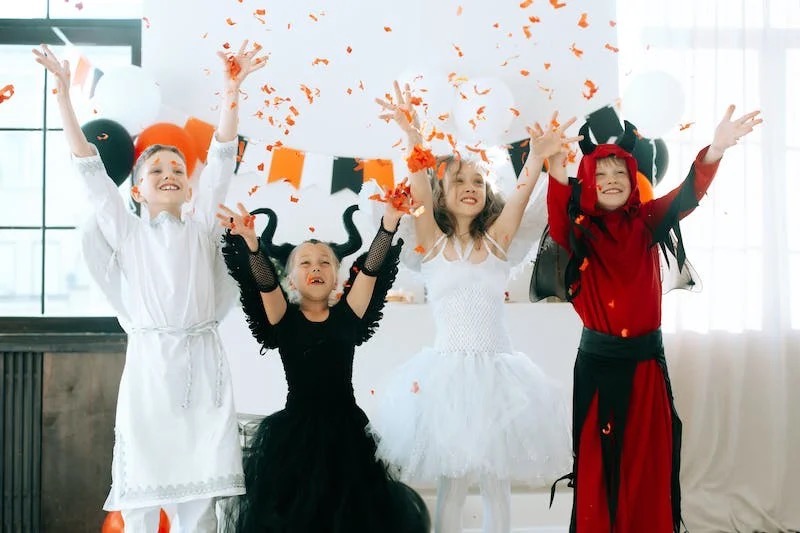
Your Halloween party might be a room full of tiny witches, a candlelit dinner with friends, or a quick celebration in the office break room. Each one calls for a different kind of spooky.
Start your Halloween party decor with a simple plan: choose a theme, repeat a small color palette, and decorate the places guests will actually use. An inviting entrance, a well-styled food table, and one photo-worthy corner can make the whole space feel ready for the occasion.
These 22 ideas mix easy DIY projects with personalized details. Pick the ones that suit your room and guest list, then use the budget and setup tips below to bring them together.
Choose a Theme Before You Buy Decorations
Choose one main motif and two or three colors. Repeating them across your sign, table, and backdrop helps individual pieces feel connected.
| Party style | Suggested palette | Main motif | Start with |
|---|---|---|---|
| Cute family party | Orange, cream, and soft pink | Smiling pumpkins and ghosts | A cheerful welcome sign and treat table |
| Witchy gathering | Purple, black, and a little gold | Moons, stars, and witch hats | A potion-inspired drinks station |
| Elegant adult dinner | Black, ivory, and burgundy | Dark foliage and subtle skeleton details | A low centerpiece and warm lighting |
| Office celebration | Black, white, and orange | Paper bats and graphic patterns | One shared snack station |
| Outdoor get-together | Orange, charcoal, and warm white | Pumpkins and lanterns | A clear, decorated arrival area |
Measure your main wall and serving table before ordering a backdrop or table covering. If you want a name or photo on a decoration, check the production and delivery estimates against your party date.
For a keepsake to build your theme around, browse Callie’s personalized Halloween party decor. Choose the focal piece first, then make or reuse the smaller accents around it.
Halloween Party Decor for Your Entrance
1. Make a Welcome Sign That Introduces the Theme
Use a framed print, a chalkboard, or a piece of sturdy card to welcome guests. Give the party a name such as “The Midnight Gathering” or “Welcome to Our Pumpkin Party,” then add one illustration from your theme.
Place the sign where guests can read it without stopping in the doorway. For a small apartment, a tabletop frame on the entry console is enough. A larger party can use an easel beside the entrance.
2. Frame the Door with a Paper Silhouette Border
Cut simple moons, stars, or pumpkin shapes from cardstock. Arrange them along one side and across the top of the doorway, leaving the door and handle free to move.
Lay the pieces out on the floor first so you can adjust the spacing. Use a hanging method appropriate for your wall finish and test it in an inconspicuous area. A limited palette makes even simple cutouts look intentional.
3. Give an Existing Wreath a Halloween Update
Reuse a plain wreath base and attach a removable ribbon bow, a small felt ghost, and a few artificial leaves. Group the decorations on one side for a lighter look, or repeat them around the circle for a fuller design.
Choose ties or craft wire that work with the wreath base so you can take the seasonal pieces off later. Use the same ribbon on your favor display to connect the entrance to the rest of the party.
4. Arrange a Pumpkin-and-Lantern Welcome Cluster
Set pumpkins and battery-lit lanterns beside the entrance at two or three heights. Use sturdy display stands where needed, and keep the arrangement outside the walking route.
For an outdoor party, choose decorations and lights intended for the conditions. Bring paper and indoor fabric pieces inside if the weather changes. Keep a nearby indoor spot available so the welcome display can move with the party.
Halloween Table and Drinks Station Decor
5. Build a Low, Layered Table Centerpiece
Start with a plain tablecloth and a narrow runner. Add a shallow tray with small pumpkins, a few artificial stems, and battery candles. The tray gives you a defined area to decorate and makes the centerpiece easy to move.
Sit down before you finish arranging it. Guests should be able to see one another and reach serving dishes. For an elegant Halloween dinner, use ivory pumpkins with burgundy accents and black napkins.
6. Wrap Napkins with DIY Halloween Cuffs
Cut cardstock into strips, wrap each strip loosely around a folded napkin, and secure the ends to form a cuff. Attach a small moon, ghost, or pumpkin cutout to the front.
Use the same silhouette at every place setting for a coordinated table. For a children’s party, write each guest’s name on the cuff. It becomes a simple place marker without adding another item to the table.
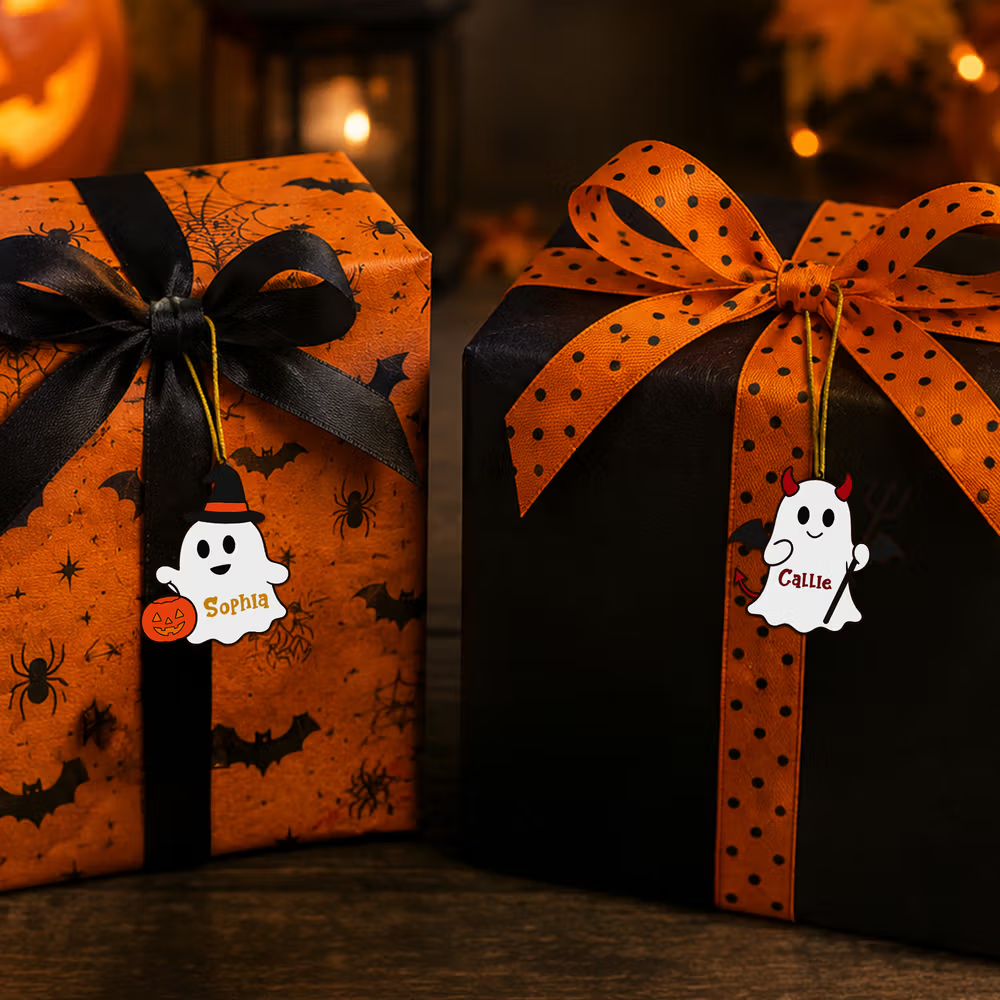
7. Add Personalized Ghost Keepsakes to Place Settings
A named ornament can make a place setting feel welcoming and give guests something to take home. Callie’s personalized Halloween ghost ornament is a wooden hanging decoration with name personalization and several ghost-themed designs.
Display an ornament beside a folded napkin or tie it to a favor bag, away from food. Check the available design and quantity options when ordering for a group. Keep the wooden decorations dry so they can be displayed again after the party.
8. Style a Dessert Table with Clear Levels
Place taller serving stands toward the back, medium trays in the middle, and small treats near the front. Use stands designed to hold the dishes securely. Leave a clear area for plates and napkins at one end.
Repeat one decoration, such as paper stars, on the backdrop and table labels. Keep non-edible accents outside the serving dishes. The layout should help guests find their treats, not make them reach through decorations.
9. Create a Potion-Inspired Drinks Station
Set out drinks in suitable beverage containers and add labels with playful names. Write the actual drink underneath each name so guests know what they are choosing. Keep alcoholic and nonalcoholic options clearly identified.
Use a dark cloth and a small moon sign to establish the theme. Place decorative bottles behind the serving area, separate from anything guests will drink. Keep the station away from the busiest part of the buffet so queues have room to form.
10. Make the Candy Display Part of the Decor
Arrange wrapped sweets in containers that fit your palette, then use matching cards to label them. A row of orange containers feels like a pumpkin patch; black and purple gives the table a witchy look.
Place take-home bags at the end of the display. If you want to add named treat containers or favors, explore Callie’s Halloween party supplies. Choose sizes and quantities for your actual guest list rather than filling every surface with extras.
Halloween Backdrops, Walls, and Lighting
11. Turn One Wall into a Photo Backdrop
Choose a plain wall or a suitable freestanding backdrop support. Add a fabric panel, a paper garland, and one central sign. Keep the middle of the design uncluttered so faces and costumes remain the focus.
Test the spot with a phone photo before guests arrive. Move the setup if bright light behind the subjects makes them appear dark. Leave enough floor space for a small group and keep the photo queue away from the entrance.
12. Personalize a Halloween First-Birthday Corner
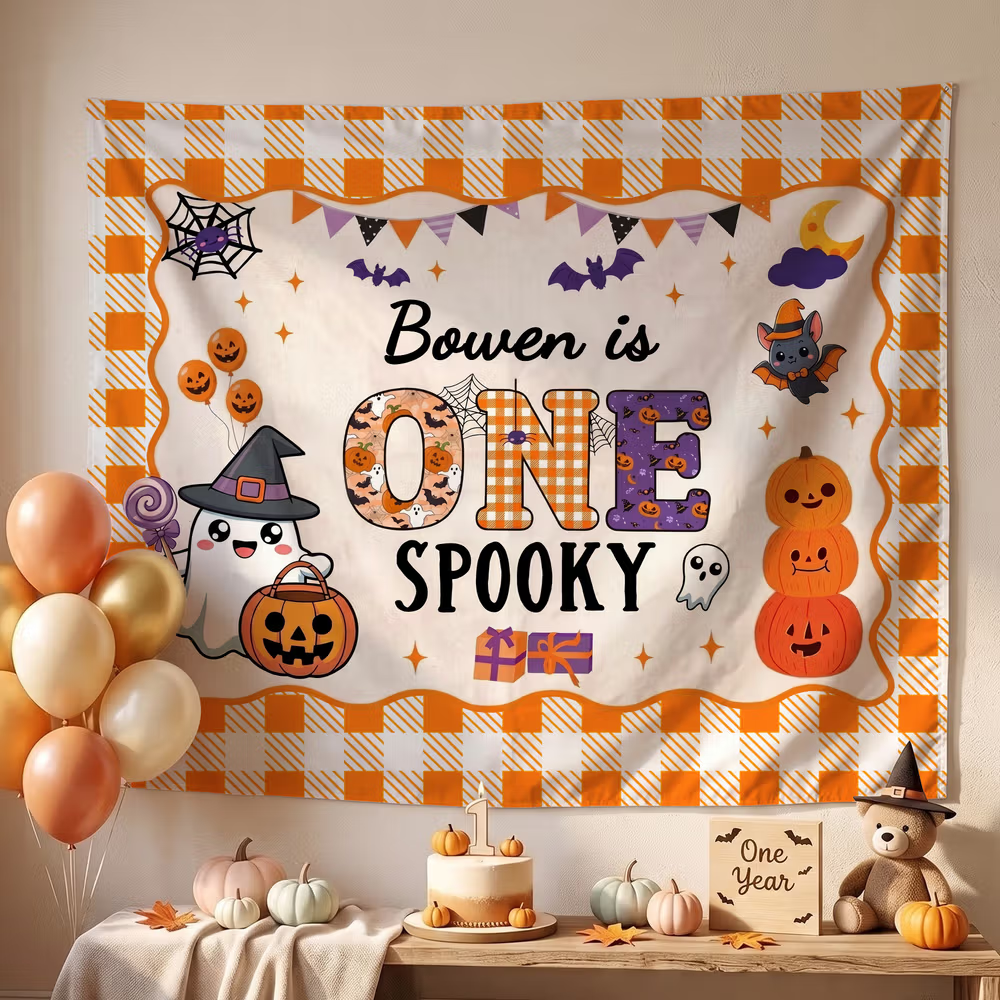
If your celebration is also a first birthday, use the child’s name as the focal point. Callie’s personalized bat, pumpkin, and ghost birthday backdrop combines a Halloween first-birthday theme with name personalization.
Hang it behind the cake table or a supervised family photo spot. Match a few paper accents to its orange-and-white gingham details.
13. Make a Paper Candy-Corn Garland
Cut triangles from white cardstock and add yellow and orange paper bands to create candy-corn shapes. Punch holes near the upper corners, thread the pieces onto string, and adjust their spacing before hanging.
The paper version is light and easy to store. Use it across a wall or the front of a serving table, keeping it clear of food and heat sources. Make larger shapes for a broad backdrop and smaller ones for a shelf.
14. Create a Moon-and-Bat Wall Scene
Cut a large circle from cream paper for a moon, then make bats in three sizes from dark cardstock. Position the moon above a sideboard and arrange the bats in a curve leading toward it.
Leave visible gaps between the silhouettes so the scene reads clearly from across the room. Fold the wings slightly for dimension.
15. Layer Steady, Warm Lighting
Use room lighting for visibility, a lamp near the seating area, and battery candles or decorative LEDs to highlight your display. Keep enough light at the food table for guests to read labels and see what they are serving.
Place lighting beside decorations rather than modifying bulbs or covering them with craft materials. Try the arrangement after dark if the party is in the evening. A few well-placed lights can give the room atmosphere without requiring every corner to glow.
16. Style a Haunted Mantel or Shelf
Choose three focal pieces: a framed silhouette, a small pumpkin arrangement, and a stack of books in coordinating covers. Vary the heights and repeat a color from the food table.
Add a short paper garland along the front, leaving the top free for the main pieces. Keep decorations clear of any operating fireplace or heat source. In a small room, this shelf can be your main display instead of a separate photo wall.
17. Give the Seating Area a Personal Touch
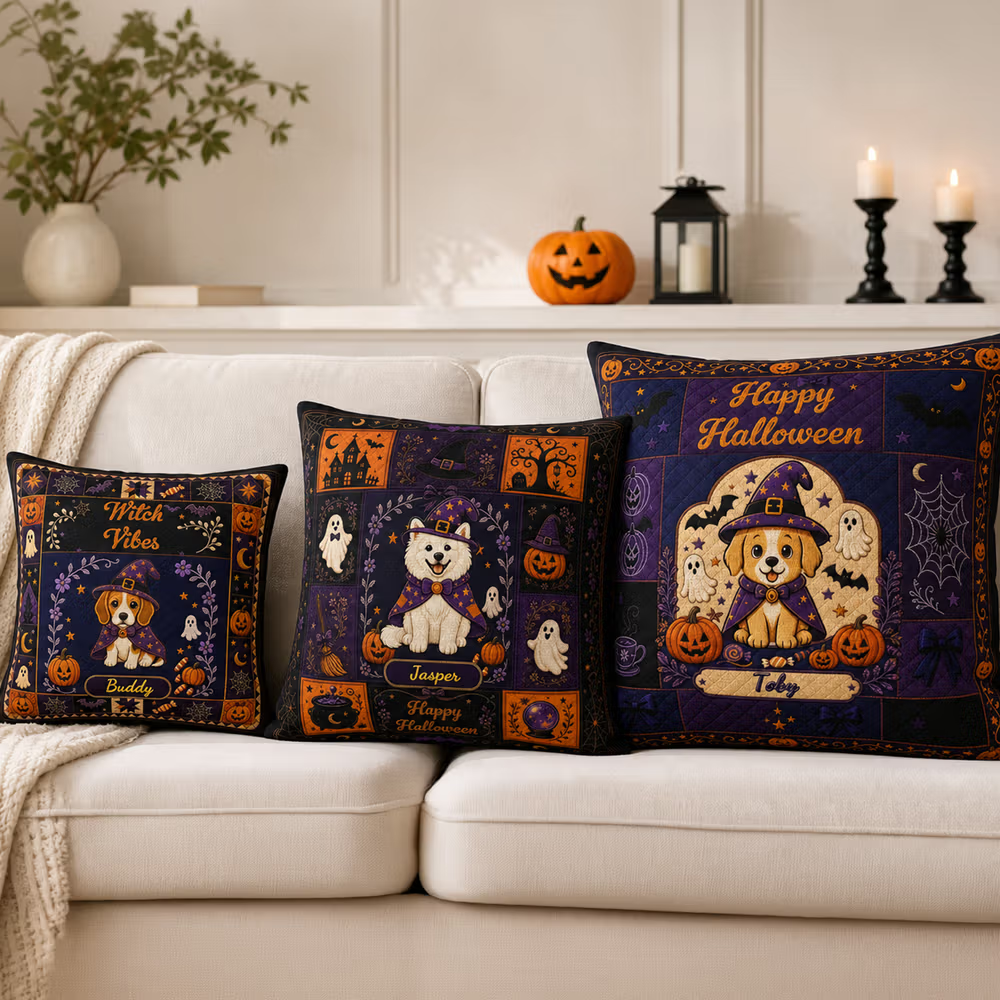
Carry the theme to the sofa with one patterned cushion and a plain throw. A pet-themed detail can be a conversation starter for a gathering of family and friends.
Callie’s retro Halloween witch-hat pet photo pillow cover can feature your pet’s image and name. Pair it with solid-colored cushions so the portrait stands out.
Halloween Activity and Party Favor Displays
18. Set Up a No-Carve Pumpkin Decorating Table
Give each participant a small pumpkin, a paper work mat, and a selection of stickers or markers appropriate for the activity. Display two or three examples so guests can start without needing a long explanation.
Keep this station separate from the food table. A nearby shelf can become a temporary gallery for finished pumpkins, adding decorations as the party goes on. Provide a place for any wet artwork to dry before guests take it home.
19. Make a Costume-Prop Station
Cut speech bubbles, stars, and spooky silhouettes from sturdy card. Finish the edges neatly and attach handles suitable for your guests. Arrange the props in a container next to the photo area.
Add a small sign inviting people to choose a prop and return it afterward. Use large, readable words that will show up in pictures. A few well-made pieces are easier to use than a crowded basket of fragile accessories.
20. Build a Color-Coordinated Favor Display
Line up favor bags on a small table and repeat the ribbon or paper motif used at the entrance. Keep any names facing forward so guests can find the right bag.
Use this station near the exit, with enough space for people to stop without blocking the door. Place a short thank-you sign behind the bags. Decorations that become keepsakes, such as the named ghost ornaments above, can serve both roles when they suit your guests.
21. Turn Finished Crafts into a Party Gallery
Set up a freestanding board for drawings, decorated paper pumpkins, or Halloween coloring pages. Clip each piece to the board as it is finished, keeping the display within easy view.
Leave a blank space for every guest who wants to contribute. At a family party, the gallery can double as a photo spot before the artwork goes home. Use your own artwork or printable designs you have permission to reproduce.
22. Create a Compact Office Celebration Station
Use one shared surface for a short Halloween message, a small pumpkin display, and clearly labeled treats. A simple black, white, and orange palette keeps the setup easy to assemble from basic supplies.
Choose mild motifs such as smiling ghosts and paper moons. Leave work equipment, access routes, and shared facilities usable, and follow the venue’s decoration rules. In a home office or studio, the same arrangement can fit on a side table for an after-work gathering.
Adapt the Decor to Your Guests and Space
| Setting | Prioritize | Simplify |
|---|---|---|
| Young children’s party | Cheerful faces, clear activity zones, adult-supervised crafts | Skip jump scares and flashing effects; keep small decor and cords out of reach |
| Adult dinner | Low centerpieces, readable place cards, a coordinated drinks area | Use fewer novelty props and leave serving space |
| Small apartment | One decorated wall and a compact buffet | Let a shelf or sofa corner replace a second display |
| Office party | A shared snack station and easy cleanup | Keep decor within the approved area |
| Outdoor party | Stable displays and lighting suitable for the conditions | Keep an indoor fallback for paper, fabric, and other indoor pieces |
How to Decorate for Halloween on a Budget
Spend on the details guests will notice most: the main backdrop, the serving table, or a personalized keepsake. Reuse plain dishes, frames, tablecloths, and lamps wherever they fit your theme.
| Budget approach | Use what you have | Make | Optional purchase |
|---|---|---|---|
| Minimal spending | A frame, plain cloth, and serving trays | A welcome sign and paper silhouettes | Basic craft supplies you are missing |
| One focal purchase | Existing tableware and lighting | Napkin cuffs and a short garland | One backdrop or named decoration |
| A fuller coordinated setup | Furniture and neutral accessories | Labels and smaller accents | A focal decoration plus selected reusable pieces |
Short on time? Set the table, finish one wall display, and decorate the entrance. Add the optional crafts only after those areas are ready.
A Simple Halloween Party Decorating Timeline
As soon as you choose the date: Pick the theme, estimate the guest count, measure the key spaces, and check lead times for personalized items. Match the invitation’s colors to the planned decor.
About a week before: Gather supplies, make paper decorations, and test the layout. Check how backdrops will hang and where lamps or decorative lights will go.
The day before: Put up wall decor, arrange furniture, and assemble dry table decorations. Set serving dishes out empty to see whether everything fits.
Before guests arrive: Add food and drinks, switch on the lights, photograph the main display, and check walkways. Put extra serving supplies where you can reach them easily.
After the party: Clean and dry reusable items according to their care instructions. Store matching decorations together and keep a photo of the finished layout for next year.
Halloween Party Decor FAQs
What decorations do I need for a Halloween party?
Start with a welcome detail, a decorated food or drinks table, and one focal display. Add lighting and a few repeated accents in your chosen colors. A small party may need only those basics; activity stations and favors are optional.
How do I make Halloween party decor look cohesive?
Choose one main motif and a limited palette, then repeat them across the room. For example, use cream ghosts with orange accents on the sign, table, and backdrop. Mix patterned pieces with plain ones so each display has room to breathe.
What are easy DIY Halloween decorations?
Paper silhouettes, napkin cuffs, a candy-corn garland, and framed signs are good starting points. They need basic materials and can be sized for your space. Make one sample before cutting enough pieces for the whole room.
How can I make Halloween decor feel elegant?
Use a restrained palette, warm lighting, and a low centerpiece. Choose a few subtle seasonal details, such as miniature pumpkins or moon-shaped place cards, and keep food, drinks, and conversation space easy to access.
Can personalized decorations be reused?
Many can be displayed again when their wording and materials suit future occasions. Names and general Halloween designs offer more flexibility than a specific age or date.
When should I order personalized Halloween party decor?
Order after checking the current production and shipping estimates for your destination. Allow time to choose the size, review names or photos, and arrange any separate display supports.
Bring Your Halloween Party Together
Choose the ideas that fit your gathering, repeat your colors, and give each display a clear purpose. The details people notice might be a familiar pet on the sofa, their name beside a place setting, or a cheerful backdrop behind the birthday cake.
Explore personalized Halloween party decorations from Callie to find a focal piece for your celebration, then complete the setting with the things you already own and a few handmade accents.